
Browser, cookies and headers
Use the built-in browser, borrow a signed-in session, and add custom request headers safely.
Three features answer the same question - how does 9xbuddy make the request my own browser makes? - and they are worth trying in this order: sign in with the built-in Browser, then point at an existing browser's cookies, and only then add a header by hand.
Browser and headers are Pro
The built-in browser, saved cookie sources and custom headers all need an active trial or subscription. The one exception is Do not use saved cookies, which is free. See Free and Pro.
Built-in browser
Open Browser, enter a URL or search term, and choose Open. The built-in view is useful when the page itself must be opened before its media can be detected, and it is where you sign in to a site you have an account with.
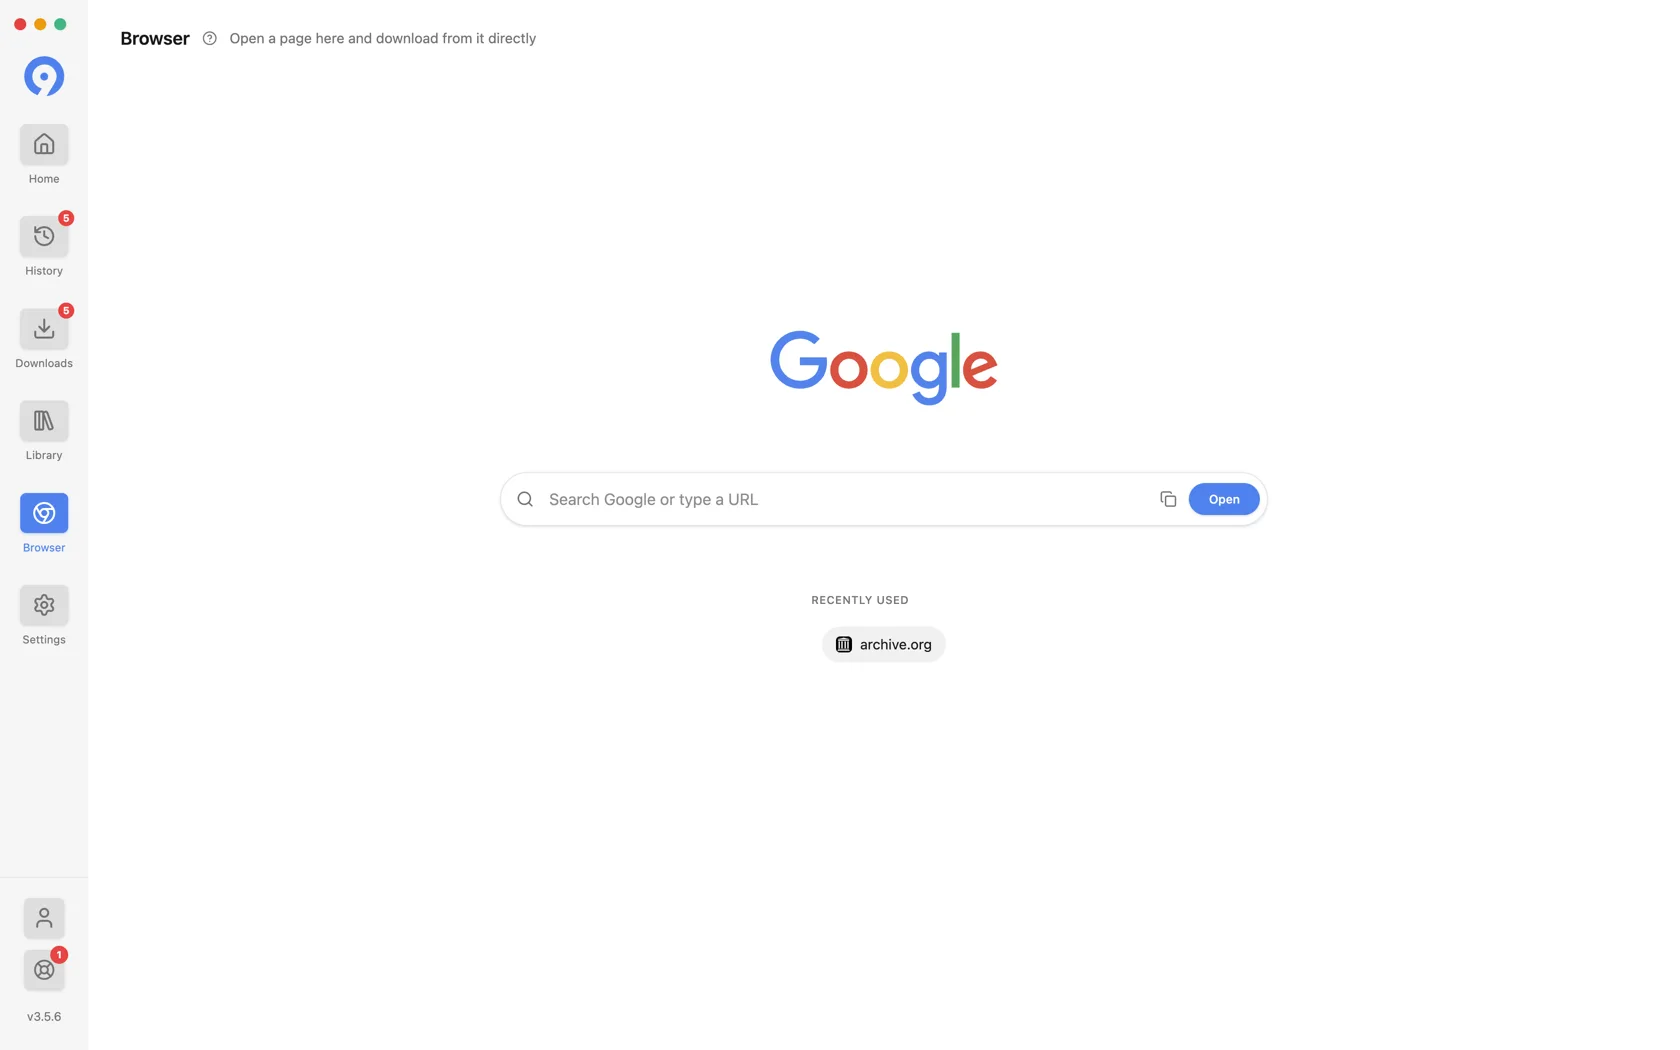
While a page is open, the browser toolbar keeps one download action: it returns to Home with the current page and whatever media was captured, so the normal format list decides what to save. The sidebar marks the Browser with a dot while a page is still open.
If a pasted link fails, a failed item in Downloads offers Browser as one of its three recoveries: open the source here, let the page settle, and try again.
Cookie sources
Settings → Cookies & Headers → Cookie sources decides which signed-in session 9xbuddy borrows for a request. One source is active at a time.
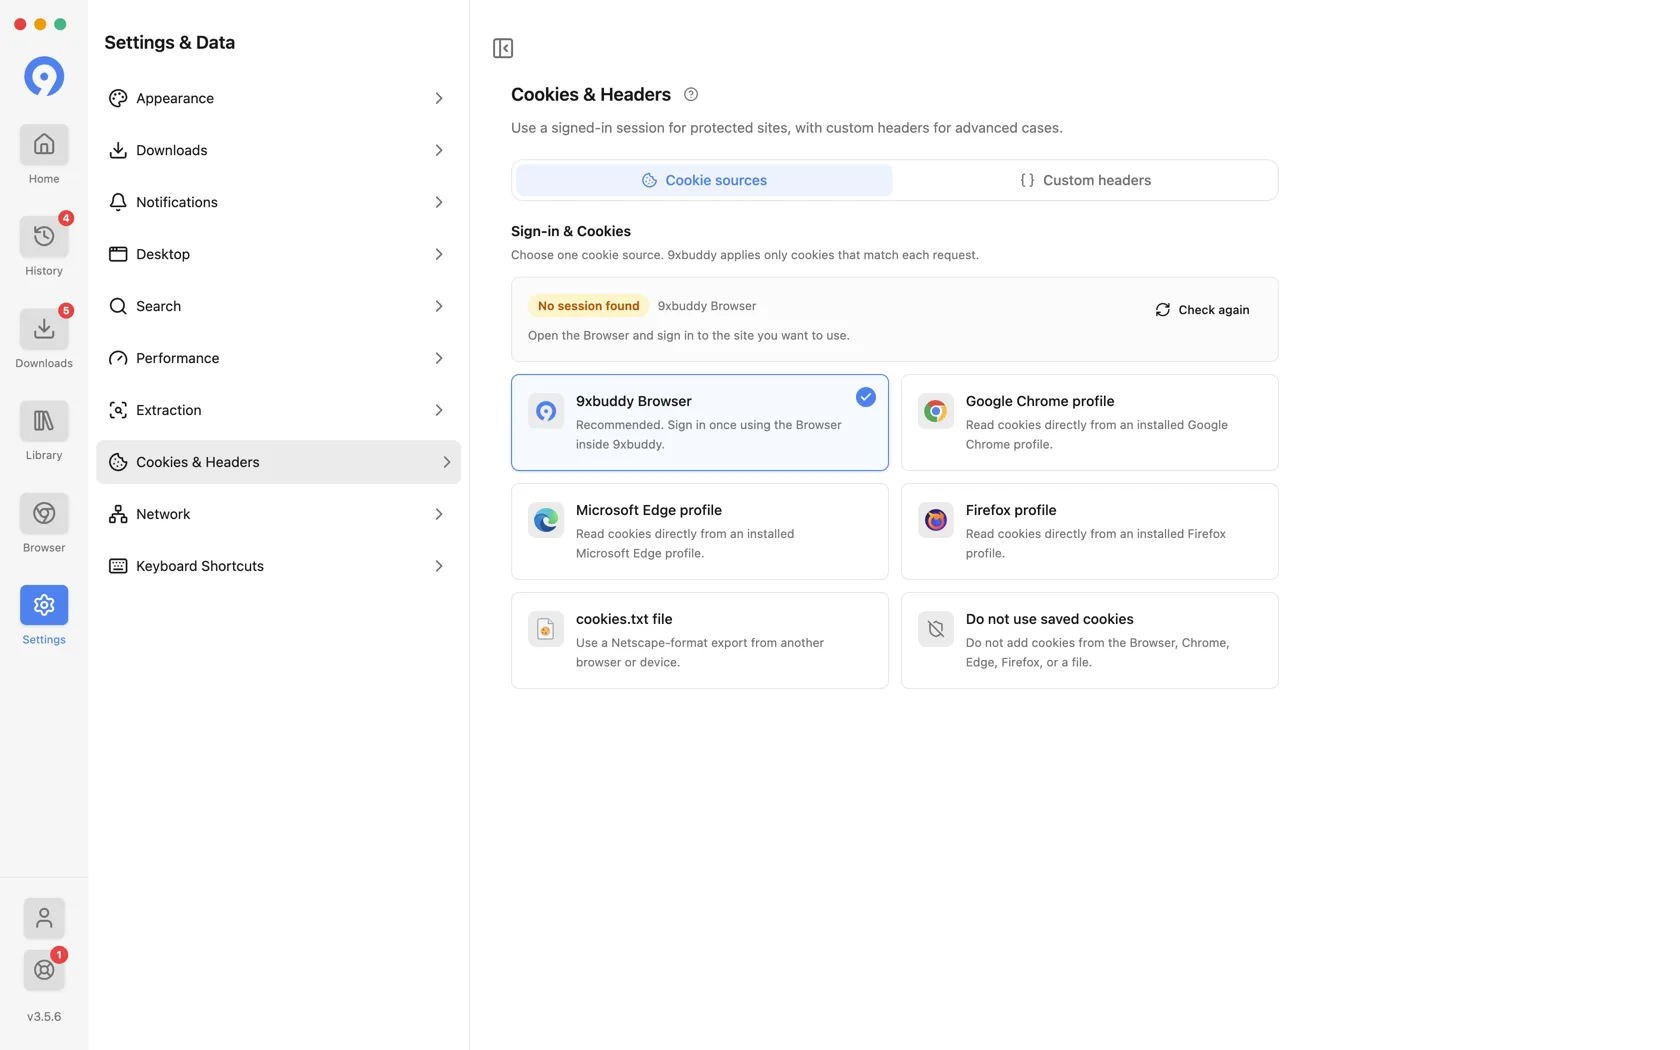
| Source | Use it when |
|---|---|
| 9xbuddy Browser | The default and the recommendation. Sign in once in the built-in Browser and that session is used |
| Google Chrome profile | You are already signed in to the site in Chrome |
| Microsoft Edge profile | The same, in Edge |
| Firefox profile | The same, in Firefox |
| cookies.txt file | The session lives on another machine, or in a browser not listed - use a Netscape-format export |
| Do not use saved cookies | You want no session attached to any request |
9xbuddy sends only the cookies that match the site being requested, so choosing a browser profile does not hand your whole cookie jar to every site.
A cookie is a signed-in session. Pointing 9xbuddy at a browser profile lets it act as you on the sites in that profile, so choose the source deliberately and set it back to Do not use saved cookies when you no longer need it.
When you need a header
Most downloads need no headers at all. Reach for one when 9xbuddy cannot fetch something your own browser reaches without trouble, and a cookie source has not already fixed it. That gap almost always means the site is checking who is asking, and a header is how you answer.
Start from the message on the failed item in Downloads:
| What the download says | What to add | Scope it to |
|---|---|---|
| Access forbidden, or the page plays fine in a browser | Referer | The site's domain |
| Sign-in required, or the media is behind a login you already hold | Try a cookie source first; Cookie if that cannot reach it | The site's domain |
| Extraction succeeds in a browser and fails here | User-Agent | The site's domain |
| A token-gated stream or private API | Authorization | The exact domain serving the media |
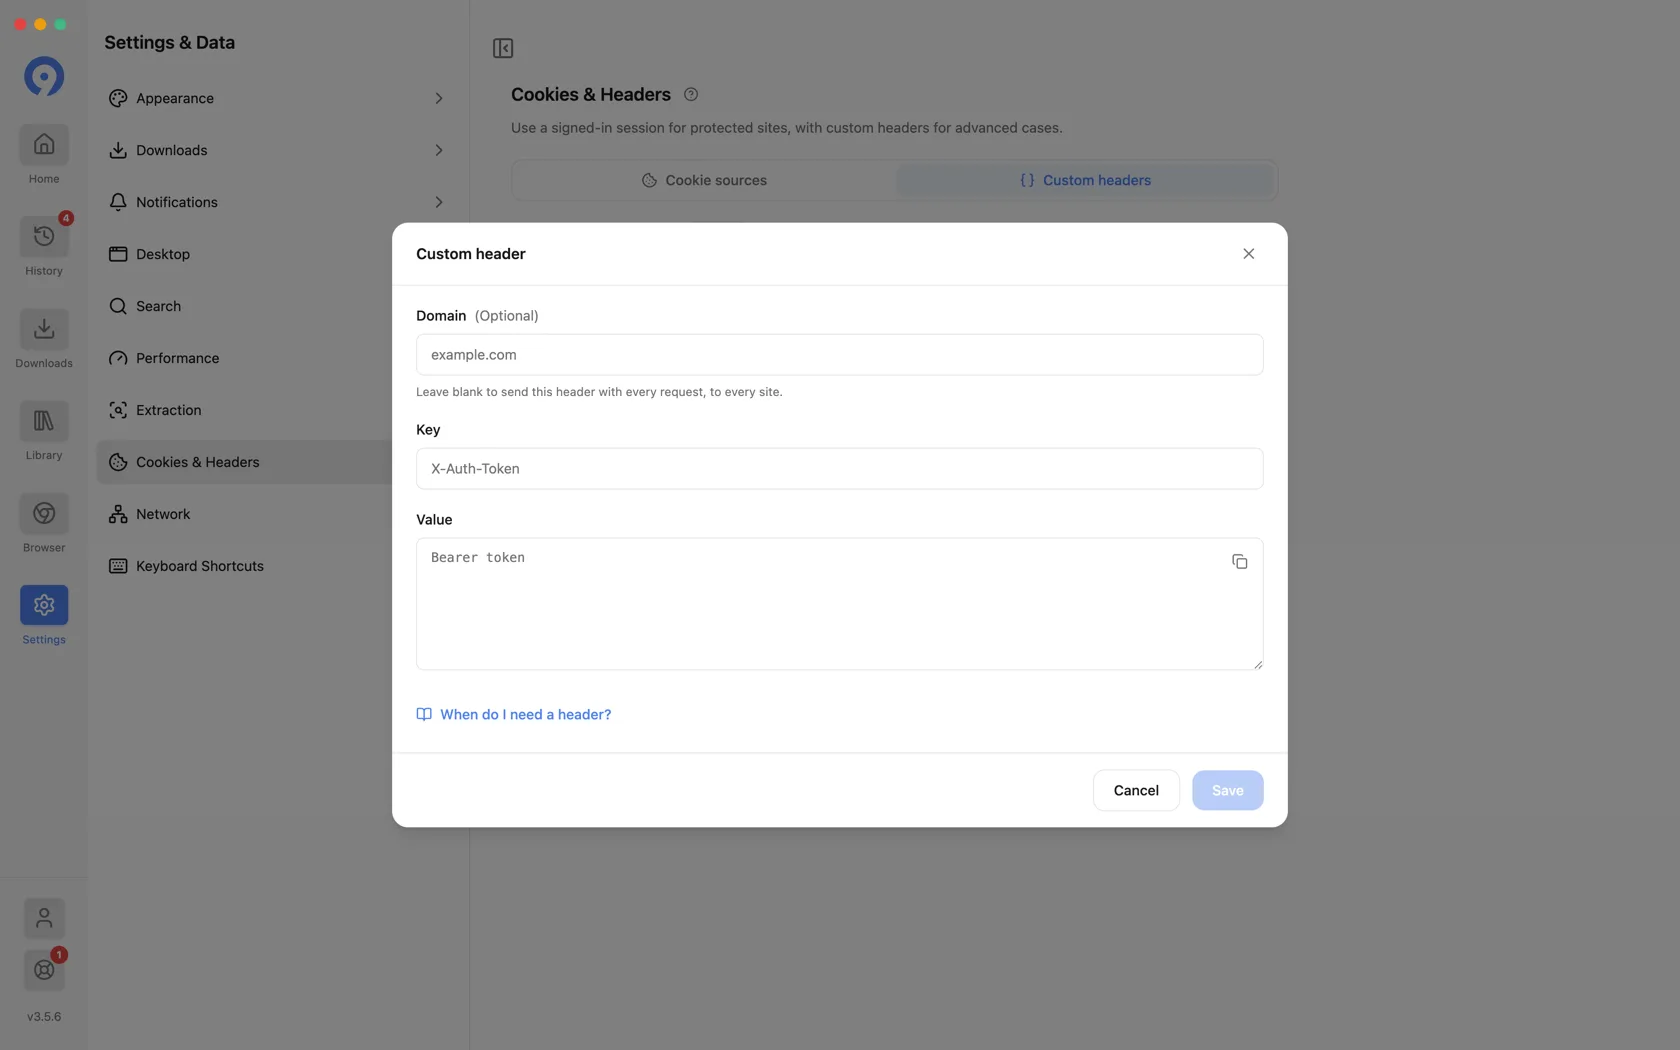
Each row is one header, added under Settings → Cookies & Headers → Custom headers → Add custom header.
Referer
A large share of "works in my browser, fails in the app" cases are this one.
Some CDNs serve media only to requests that claim to come from a page on the
same site, so a request with no Referer is refused.
Domain   example.com
Key      Referer
Value    https://example.com/watch/12345
The value is the page you were watching, not the media file's own URL.
Cookie
Use this for content your account can already reach when no cookie source can supply it - a members' area on a machine you cannot sign in from, for instance. Copy it with Import from request rather than by hand; session cookies are long and one wrong character fails silently.
Cookies expire. If a download that worked last week now fails with the same message, replace the cookie before changing anything else.
User-Agent
A few sites serve media only to browsers they recognise, and refuse anything
else. Setting User-Agent to the exact string your own browser sends makes
9xbuddy's request look like the one that already works.
Domain   example.com
Key      User-Agent
Value    Mozilla/5.0 (Macintosh; Intel Mac OS X 10_15_7) AppleWebKit/537.36 (KHTML, like Gecko) Chrome/135.0.0.0 Safari/537.36
Authorization
Needed only where a stream is issued against a token rather than a session - typically an API you already have credentials for. Scope it to the single domain that serves the media and remove it once you are finished.
Always fill in the domain
The domain field is optional, and leaving it blank is the widest possible
setting: the header is attached to every request 9xbuddy makes, to every site.
For a Cookie or Authorization header that means handing your session to
unrelated hosts. Fill in the domain unless you have a specific reason not to.
Custom headers
The Custom headers tab is marked Advanced, and its empty state says the important part: most sites do not need one, so add a header only when a site or a support guide tells you to.
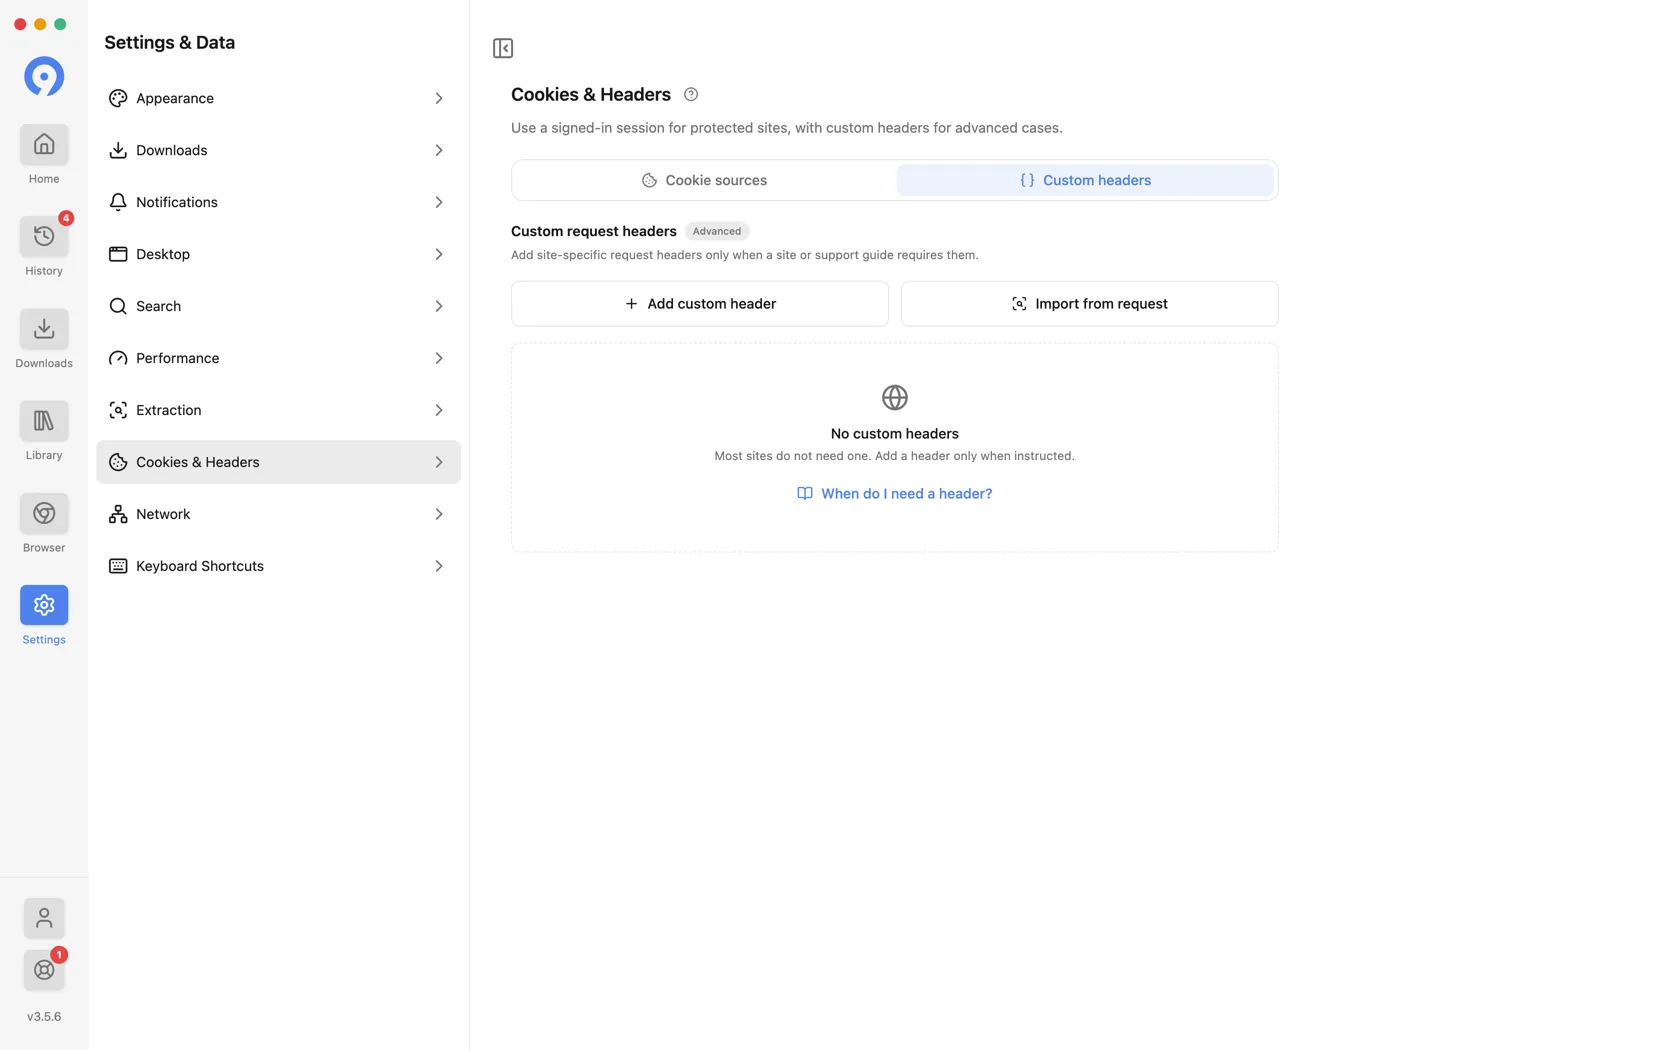
Two actions:
- Add custom header - enter a domain, a key and a value by hand.
- Import from request - paste a whole request and let 9xbuddy split it into headers for you.
Headers are grouped by domain once added, and Clear All removes the whole set.
Import from request
Typing a cookie by hand is error-prone. Copy the real request instead: every
major browser can export one as a curl command, and Import from request
reads that format directly.
- Open the page in your browser and sign in if the media needs an account.
- Press F12 to open developer tools, then select the Network tab.
- Reload the page and let it play far enough for the media request to appear.
- Right-click the request and choose Copy → Copy as cURL in Chrome and Edge, Copy Value → Copy as cURL in Firefox, or Copy as cURL in Safari.
- In 9xbuddy, open Settings → Cookies & Headers → Custom headers → Import from request, paste, and confirm.
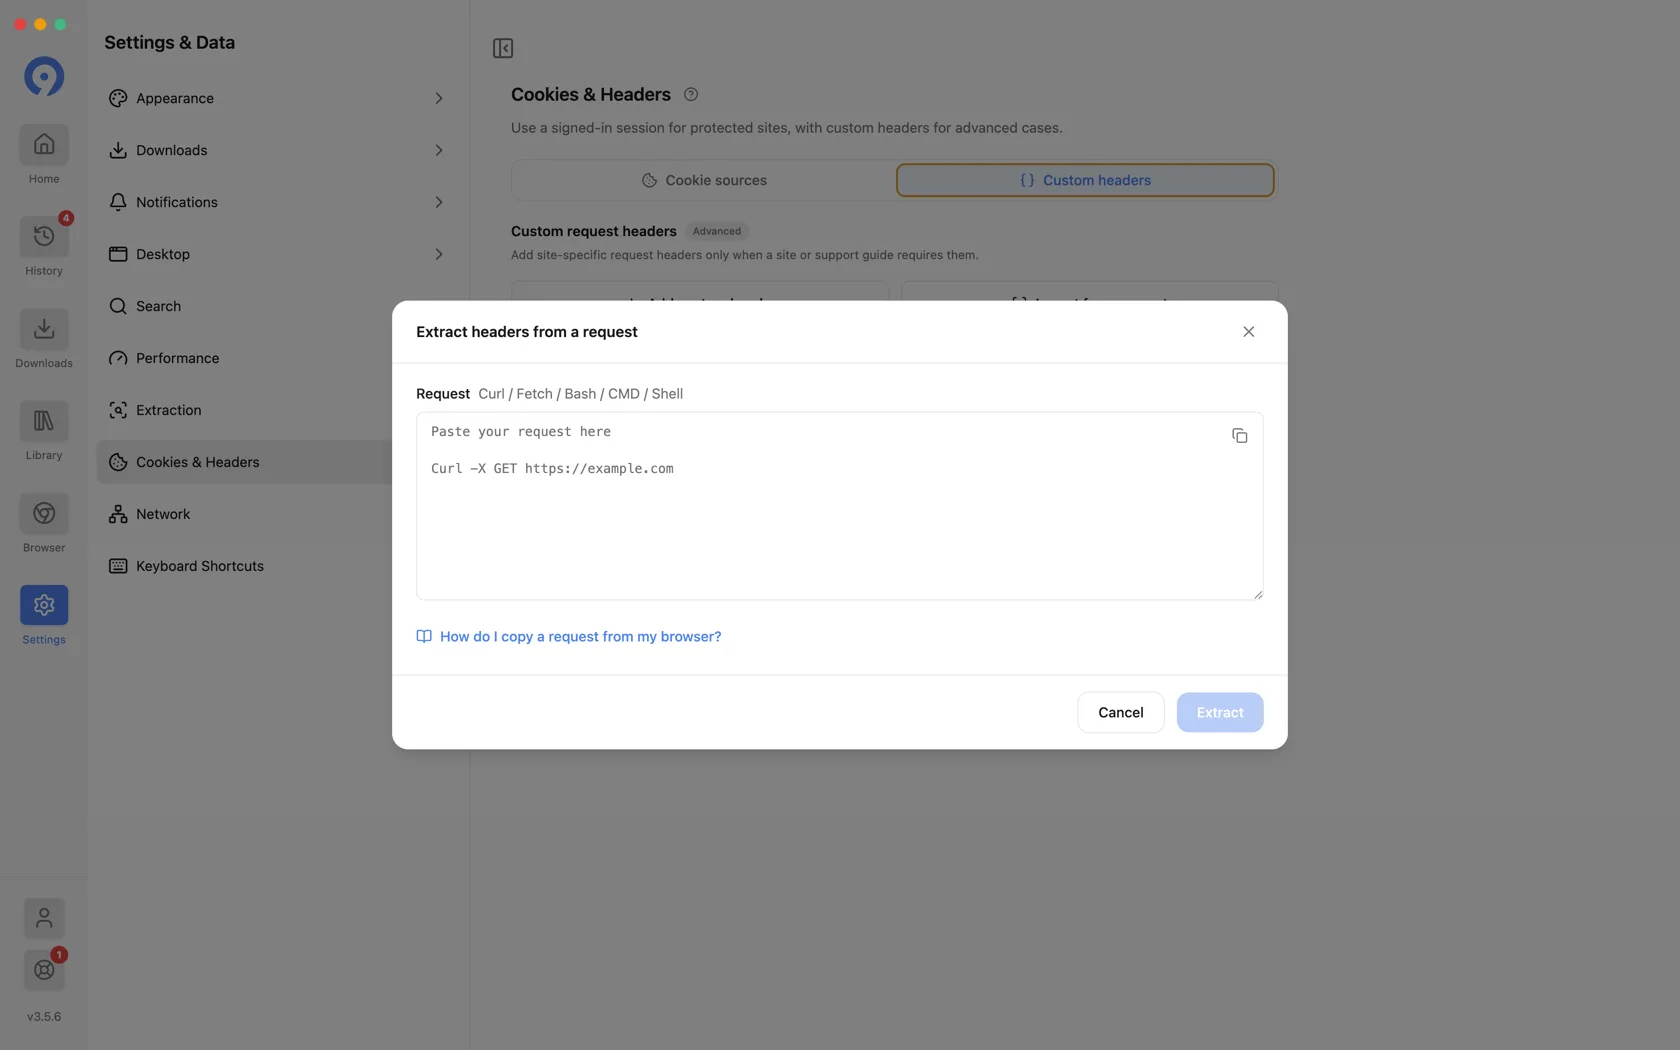
curl, fetch, Bash, CMD, and PowerShell forms are all accepted. 9xbuddy reads
the headers out of whichever you paste, and you can delete any you do not want
before saving.
Review what came across before you keep it. A copied request usually carries far more than the download needs, and everything you keep is sent again on every matching request.
Headers can contain credentials
Cookies and authorisation headers can grant account access. Add only data you understand, limit it to the intended domain, never paste it into support messages or screenshots, and remove it when it is no longer needed.
Access and site rules
None of this bypasses a site's permissions. Signing in, borrowing a session and adding a header only let 9xbuddy make the same authorised request you could make yourself. Private, removed, region-restricted, DRM-protected, or otherwise unavailable media may still fail.
If none of it helps, the cause is usually elsewhere: see Troubleshooting for the failure messages and what each one means.