
Your first download
Extract a link, tick a format, and start the transfer.
In short: paste the link → Download → tick a format → Start download → find it in your Library. Each step is below.
1. Paste a link
On Home, paste a media or page URL into the field at the top, then choose Download. 9xbuddy inspects the source and lists what it can save.
The same field takes a search term instead of a link. Type words rather than a URL and 9xbuddy searches for the video, so you can start from a title you remember. Settings → Search decides which provider is used and whether suggestions appear as you type.
Three other ways to get a link in:
- Drop it. Drag a link from your browser's address bar onto Home, or drop a text file of links.
- Copy it. With Watch clipboard on, a link you copy is offered on Home as soon as it reaches the clipboard - see Desktop integration.
- Paste a list. Switch to Bulk list for many at once - Bulk download.
2. Choose what to save
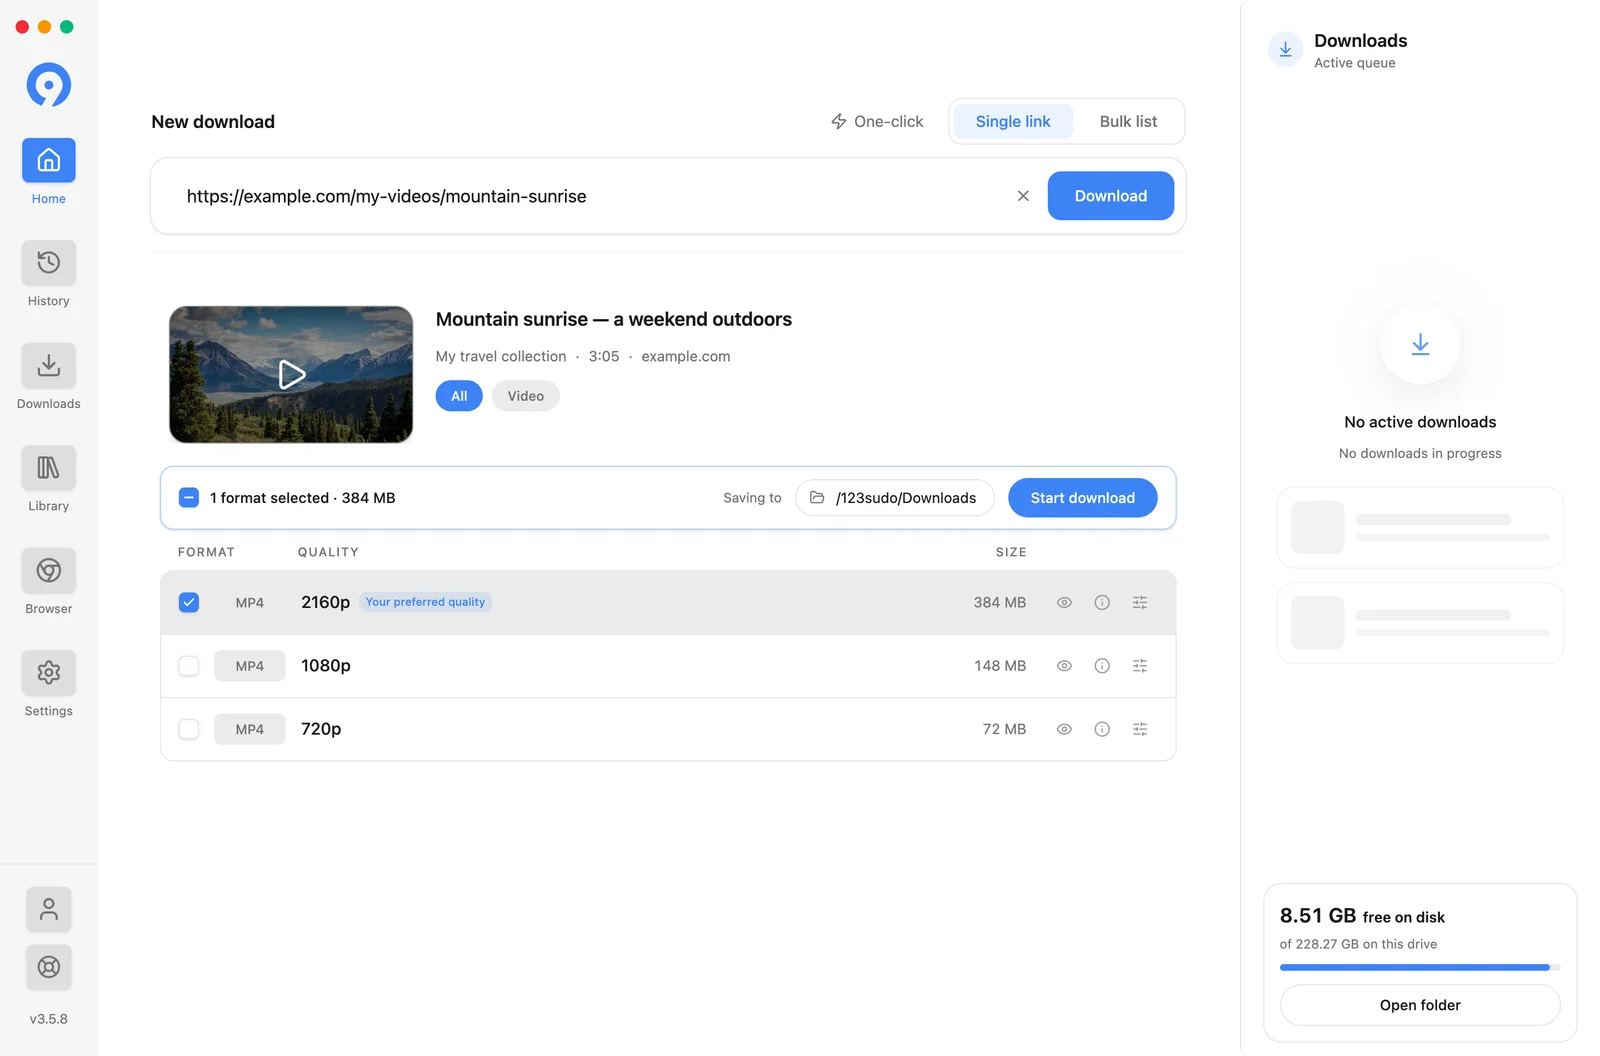
The filters above the list narrow it when a page returns many results: All, and Video, Images or Audio where those types exist.
Every row carries its own controls on the right:
- Get size asks the source for the file size when it is not known yet.
- The eye previews the format before you commit to it. Pro.
- The i shows the technical detail behind the row - codec, container, bitrate.
- The sliders set options for that one row.
A row can be marked Your preferred quality. That is the match for Settings → Downloads → Preferred Quality, and it is ticked for you.
Video and image results download on a free account. Separate audio and subtitle results need an active trial or subscription, as do 4K and 8K quality and the preview control. Free and Pro lists the rest.
3. Check the destination, then start
The bar above the list is the whole confirmation step. It shows how many formats are ticked, a Saving to folder you can change, and Start download.
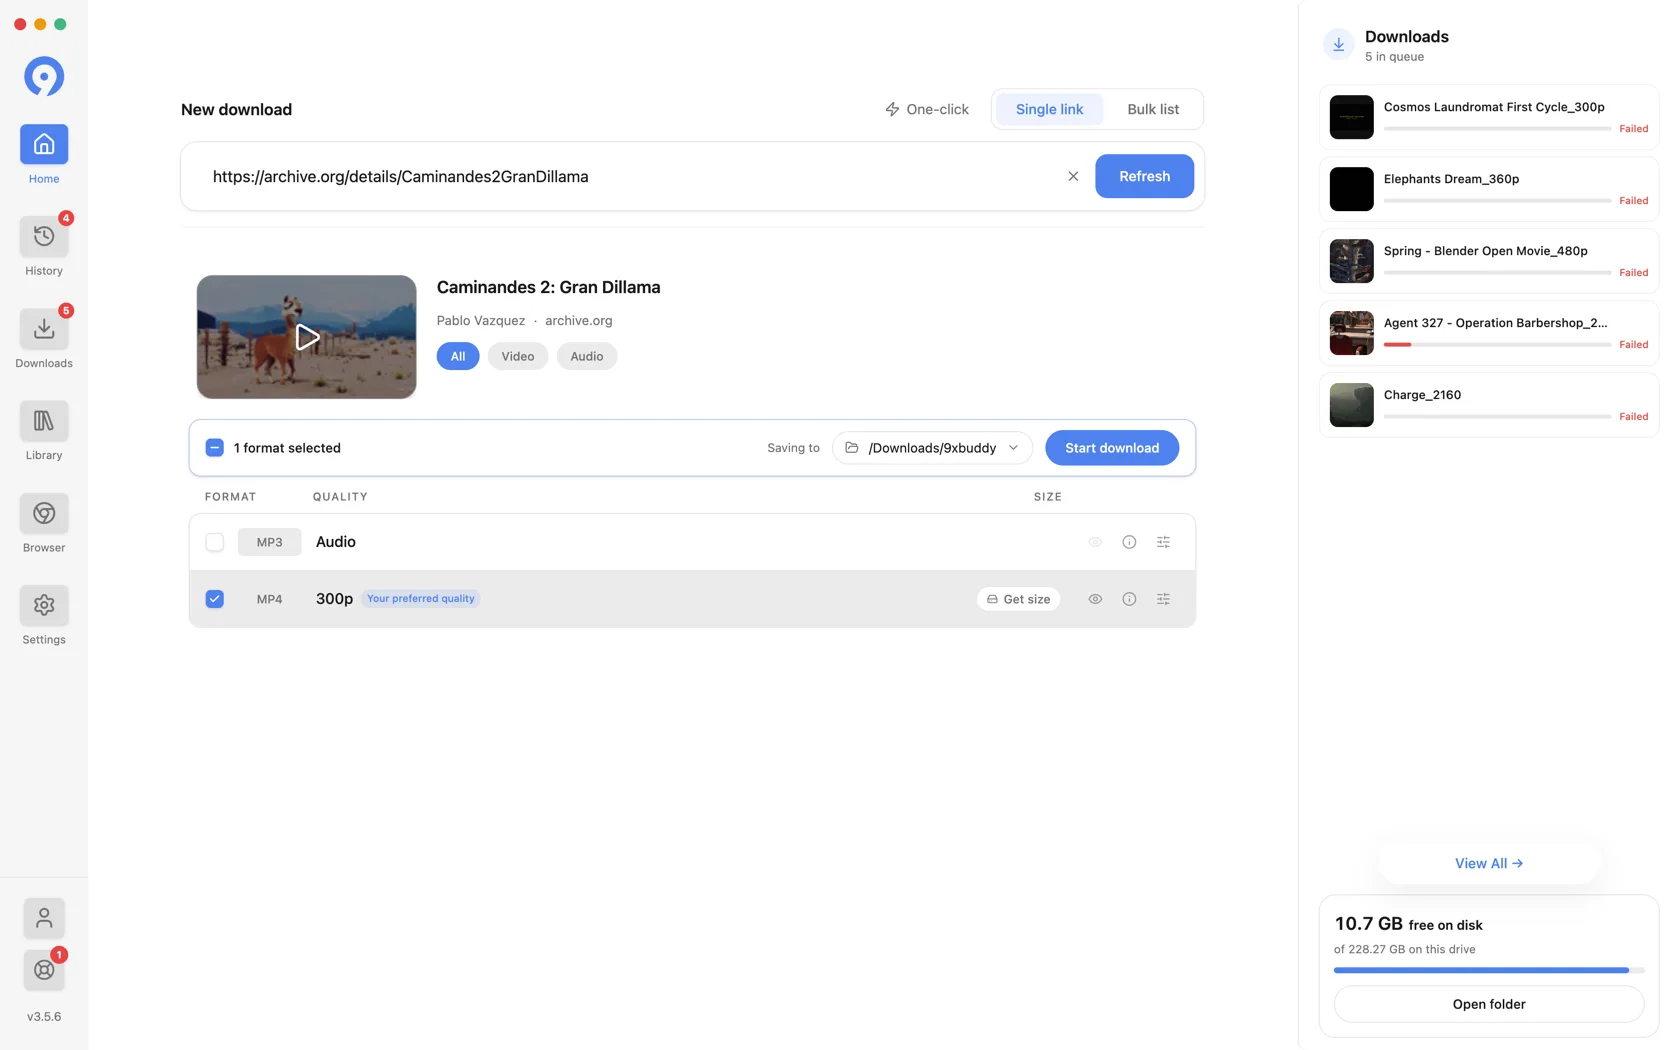
Tick more than one row to save several formats from the same source in one go - the video and its subtitles, for instance. Each becomes its own item in the queue.
Choose Start download. The items appear in the queue panel on the right of Home, and under Downloads.
One-click skips this step
One-click, beside the Single link / Bulk list switch, downloads straight at your preferred quality without showing the format list at all. It is a Pro feature, and it uses the same daily allowance as any other download.
4. Find the finished file
A completed transfer leaves the queue and lands in Library.
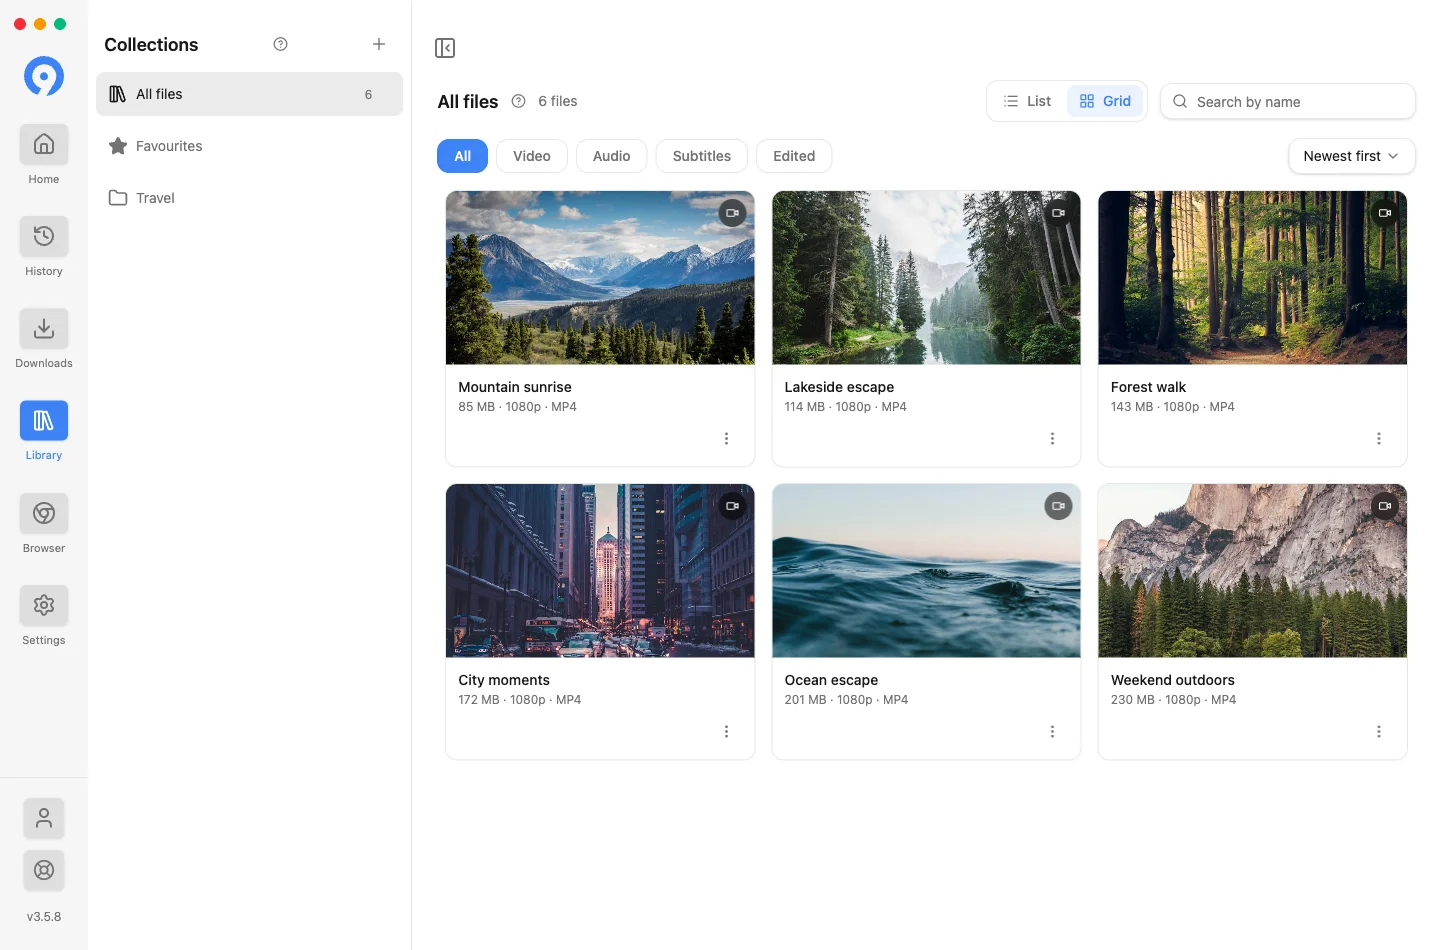
Click a card to play the file in 9xbuddy, or use Show in folder on its menu to reveal it in Finder or your file manager. Removing a Library entry does not delete the file on disk - Move file to Trash is the action that does.
See Library for collections, favourites, filters and editing, and Files and folders for where downloads are written.
Coming back to a link
Home keeps the last few links you resolved under the search box, newest first, so returning to one is a click rather than a search. View all opens the full History screen.
Only finished work is listed. An attempt you cancelled, or one that failed, is not a shortcut worth offering, so it stays in History where its status is spelled out.
To take the list off Home, hover it and choose Hide Recent from the menu at its top right, or turn off Show Recent on Home under Settings, Appearance. On Android the switch is the only route: More, Settings, Appearance.
Hiding the list does not stop 9xbuddy recording what you download. The entries stay in History, and Clear All there is what removes them.